At first, I found photographing the tribes of the South Omo (Omo Valley) region of Ethiopia quite a strange and uncomfortable experience, because the nature of taking pictures in South Omo is often simply paying people to pose in front of your camera. This makes just about any trip to South Omo a seem like a transaction rather than a personal experience, and can drain some of the joy out of the act of photography at times.
The basic rule in South Omo is this: tourists must pay a small sum to more or less each and every tribe member he or she photographs in the region. This applies to all posed shots and often even candid ones, should you get caught in the act. This relationship is something that’s been reinforced by sustained tourism to the area: someone started paying the tribespeople for photos long ago, and as that has been repeated and reinforced over the years only to become one of the primary touristic experiences of being in South Omo, like it or not.
RELATED POST: How to Visit South Omo, Ethiopia (Omo Valley)
Photographic encounters between tourists and South Omo locals can become confrontational. On my trip, I got surrounded in tribal villages by locals grabbing me and insisting I take their photo and pay them. In markets, I got yelled at almost every time I raised my camera to my eye – because several locals downrange of my lens thought I should pay them, whether or not I was photographing them at all. This made my South Omo experience feel kind of terrible and stressful at times, and required that I be extra vigilant any time I even thought of taking pictures.
I didn’t want to feel that my trip was some kind of objectifying, crass “human safari” of sorts. I needed to find a way to feel good about spending time in South Omo – so I did my best to learn how to best interact with locals so they could get what they wanted (usually just a bit of cash) and I could get something I wanted too (good photos of the people of South Omo!).
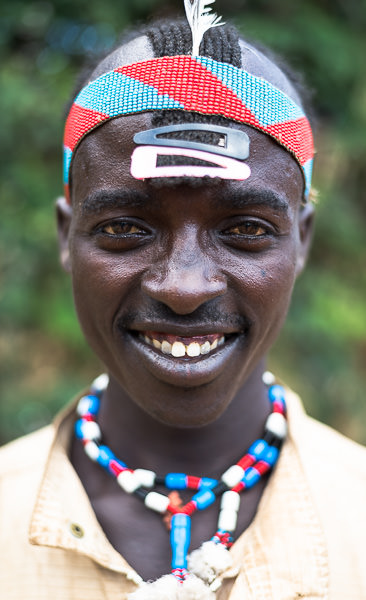
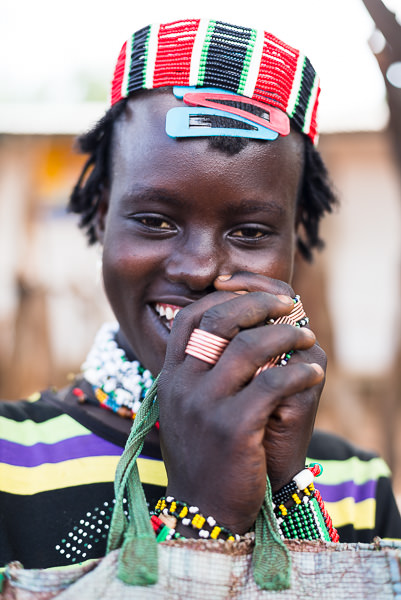
One of my favorite people I met in South Omo. This Benna man, who I met in Key Afer’s market, was all smiles.
As soon as I accepted and internalized that this transactional relationship didn’t have to be a wholly negative one, I found that I could interact with the locals in a much more positive manner, get better shots, and have more fun too. It all started to make sense, and helped me to enjoy South Omo again.
Accordingly, I’ve put this guide together to share some rough guidelines about how to approach photographing the tribes of South Omo so you can maximize your photographic output and minimize potential confrontations and problems. Learn from my (mistakes) experience!
I spent about a week visiting and photographing the tribes of South Omo as part of a one-month personal trip throughout Ethiopia in late 2015.
Who this Guide is For
This guide is for hobbyist / enthusiast photographers touring South Omo for a week or two and hoping to bring back the best photos they can. Most people in this category will be working with one or two camera bodies (or perhaps just a cellphone with a camera) and primarily natural light, and will be making short visits to multiple tribes.
If you plan to go bigger than this on equipment – say, working with off-camera flash, strobes and/or grip equipment – things may get a little more complex. If this is your goal, I recommend you speak with your guide about how to approach your trip’s daily schedule, as well as what associated fees you’ll need to pay each subject you shoot. I would also highly recommend that you hire a guide that can reference photographers he or she has worked with in the past.
Also: if you plan to spend great deal of time with one tribe or another, the below photographic approach may not apply completely. If you’ve done this, feel free to comment and let me know how photographing the tribes of South Omo worked for you.
Before you Visit South Omo
Here’s what actions I recommend any photography enthusiast take before traveling to South Omo.
Review What’s Already Been Shot
Many, many photographers have visited South Omo before you – review others work before you arrive so you know what’s been done, what’s possible and what you can aspire to or build off. Here are a few great photographers that have shot South Omo to get you started:
Eric Lafforgue
Brent Stirton
Jimmy Nelson
Also, know that you may come back with photos of some of the same people you’ve seen photographed by your photo heroes in the past. Seems like a strange coincidence, until you realize that tribes like the Karo have populations under 2000.
Previsualize your Desired South Omo Shots
Are you hoping to capture environmental portraits of South Omo’s amazing tribespeople? Or maybe tighter headshots? Group shots? Are you more interested in photographing women, or men, or children, or all of the above? Which tribes are you most interested in? Make some basic creative choices before you arrive at a given village or market so you can be a more efficient and effective photographer while shooting there. You don’t have to box yourself in with preconceived notions – just give yourself a starting point so you have an idea of how to proceed once you arrive in South Omo.
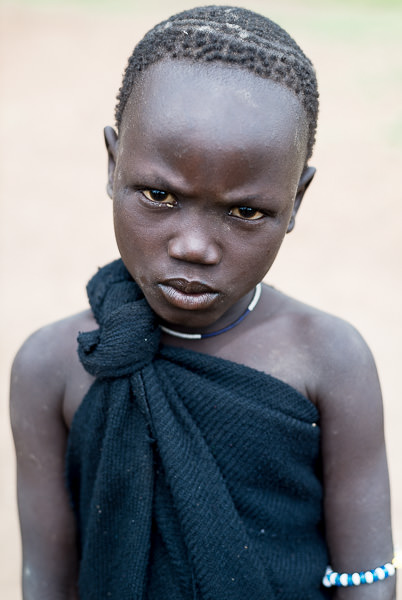
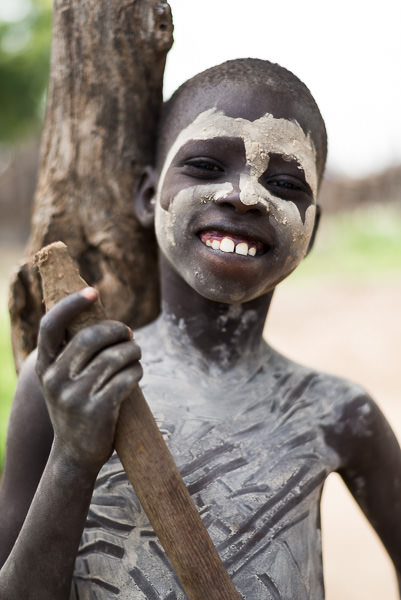
Portrait of a Mursi boy. One of my goals was to shoot fairly straightforward portraits of tribespeople – partially because I had limited control over my lighting and backgrounds, and partially because I find straightforward portraits compelling.
Also, know that most short-term visitors to South Omo will be allotted an hour or less per tribal village visit / market day. If you expect to shoot anything more profound or “honest” than what’s immediately presented to you, you should be prepared to spend a significantly greater amount of time and effort establishing trust and educating yourself on the people’s lives than the average visitor will ever do. Establishing trust and rapport with your subjects is important for any sort of meaningful documentary photography, anywhere in the world.
What Photo Equipment Should I Bring to South Omo?
This really depends on what kind of shots you plan to take as well as your photographic style, and is highly subjective.
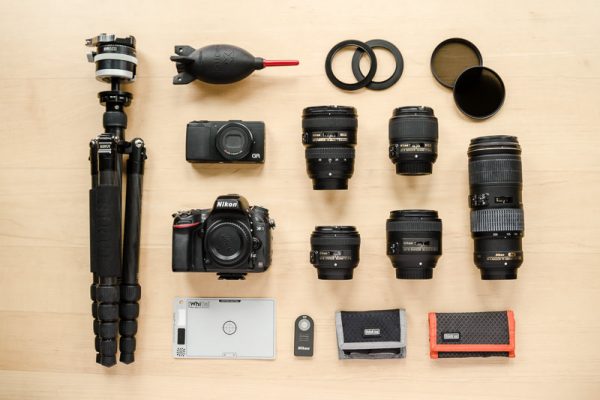
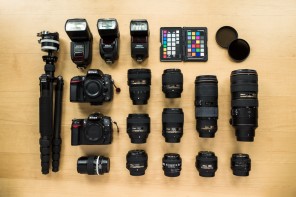
On my 2015 trip, I was limited to carrying the following gear due to weight and bulk considerations on my two-month trip in east Africa (Kenya + Ethiopia).
- Nikon D610 full-frame DSLR body
- Nikkor 18-35mm f3.5-4.5G
- Nikkor 50mm f/1.8G
- Nikkor 70-200mm f/4G VR II
- Ricoh GRV (28mm equiv. APSC compact)
This list is obviously by no means prescriptive – you should shoot on the gear you are comfortable with and can afford, be it from any manufacturer.
I chose to shoot the majority of my portrait shots on my 50mm f/1.8G, and my market shots and Hamar bull jumping ceremony shots primarily on the 70-200mm f/4. The Ricoh GRV was used for medium-wide shots (I don’t think I ever mounted the 18-35mm while I was in South Omo to be honest). I wouldn’t have found a real need for any lens longer than 200mm for photography in this region.
If I had my choice, I probably would have carried two full frame bodies – one with a fast 28mm or 35mm prime mounted, the other with a fast 85mm, plus a 70-200 f4 or f2.8 in my bag. Your mileage may vary.
Gather Small Bills / Coins Before South Omo
It’s important to carry as many 5 Birr notes in good condition (no tears, preferably not even wrinkled) and as many small coins as possible for your visit to South Omo. Locals will not accept damaged currency and very few people will be able to make change for larger bills.
That said: some villages may be able to make change for you if you’re taking a lot of photos in their village (Mursi tribe made change for me, for example), but it’s not wise to rely on this. Come prepared if at all possible.
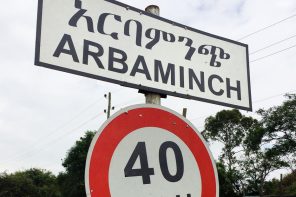
If you’re on a long trip in Ethiopia, gather small bills and change as you go along – for example, I saved every 5 Birr bill in good condition that I could get for around two weeks prior to my South Omo trip. However, if you’re coming to Ethiopia solely for a South Omo visit, talk to your guide about how to amass enough small bills and coins before you leave Addis Ababa or Arba Minch.
Photographing the Tribes of South Omo
These are the sequential steps I recommend for photographing the tribes of South Omo once you’ve arrived.
The basics of shooting boil down to this: with each person you photograph, you will get about 5-10 seconds of shooting time, per 5 Birr ($0.25 US), per subject in a given shot. Read on for greater detail.
#1. Prep your Camera
Before you arrive at a given village or market, mount your preferred lens and set exposure, white balance, etc prior to selecting a subject and according to the shots you may have pre-visualized. If you’ve only got 30-60 minutes in each destination, it’s important to be 99% ready before you get there. This also means having preferred lenses close at hand, as well as any peripherals you might need like an extra battery or memory card. If you need it, don’t leave it in your tour vehicle – carry it with you as you walk. Shoot in RAW if possible.
#2. Select your Subjects
Most every South Omo local knows the rules – tourists must pay locals for taking photos – and thus many locals will approach you and ask you to take their photo in order to make a little money. However, the people that approach you may not be the people you’d prefer to photograph. Accordingly, I think it’s vital for the photographer to select their subjects, as opposed the subjects choosing the photographer.
During village or market visits, some tribespeople can become extremely insistent that you take their picture (and pay them), sometimes touching or grabbing you to get your attention, asking “Photo?” While you may want to photograph some of these people, you might not want to photograph all of them. In these situations, remember: you don’t have to photograph/pay anyone you don’t want to photograph/pay.
Be patient and resolute and pick who you want – and nobody you don’t want. This means you can break up proposed “group shots” into solo portraits, or ask to photograph people that haven’t yet volunteered themselves as a subject, or whatever you want, really. Photographing South Omo tribespeople is a fee-for-service activity at this point, and you are more or less the client. Always be respectful, but it’s fair to photograph one person and not another. You get to choose.
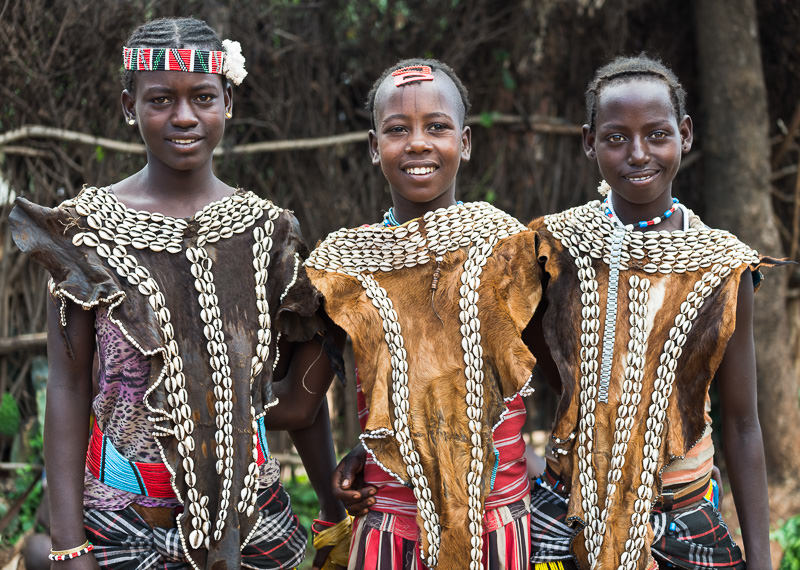
Shooting group photos at the same time as other tourists can lead to confused eyelines. Only the girl on the left is looking toward me in this shot.
Of course, the above approach will result in posed-looking photos. If your goal is candid shots, be aware that you may not always pull them off. Attempts at stealth shooting will often get interrupted by vocal, visual protests that’ll show up on camera.
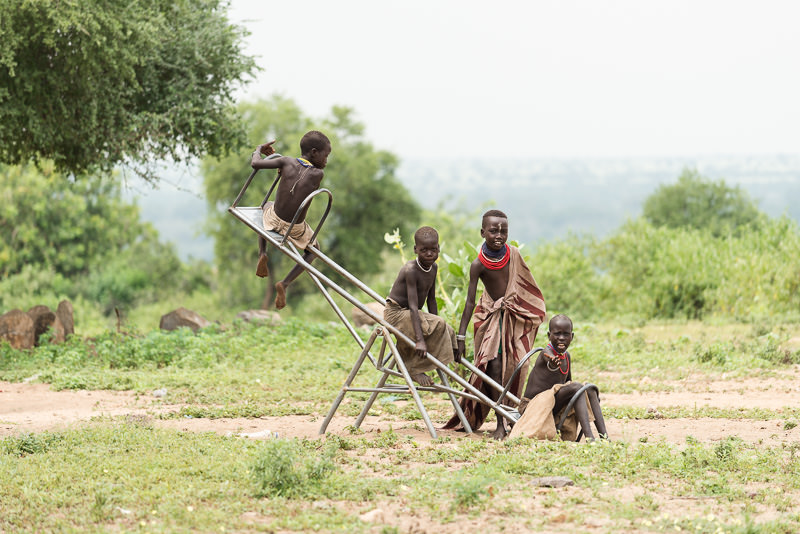
Karo boys on a see-saw in the village of Kolcho. Notice that the boy on the right is shouting at me to pay him, despite the fact that I was quite a distance from the boys and didn’t ask them to pose in any specific manner.
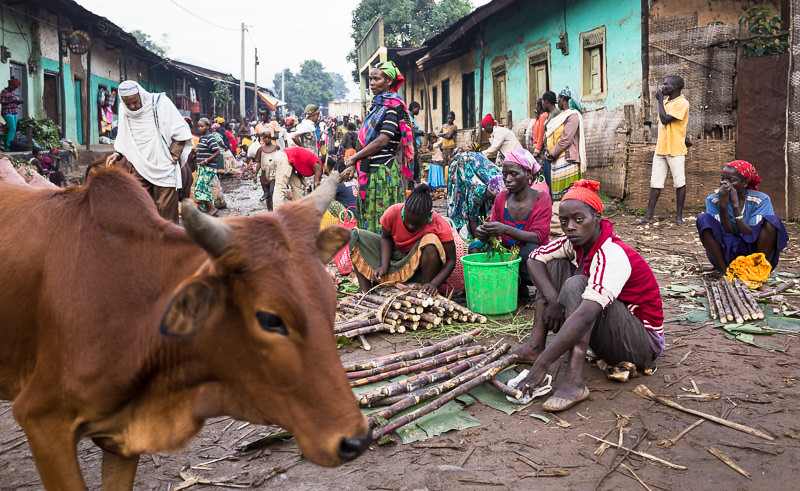
One of the only places that I wasn’t asked to pay money for photos in South Omo was in the market in the small city of Jinka.
#3. Negotiate and Confirm a Price with your Subject
After you select a subject, negotiate and confirm photo prices up front with each individual person. 5 Birr (about $0.25 US) is a normal fee as of 2015/2016.
Many of the tribespeople you interact with do not speak your language, be it English, Spanish, French, Mandarin, whatever. Use your hands to display a price (5 fingers to represent 5 Birr, for example). If you do not confirm pricing up front, you will find that some people will angrily demand a fee higher than you expected to pay, and it things can get ugly quickly. Head this off before it happens by locking in a price first. Don’t pay your subject before you photograph them.
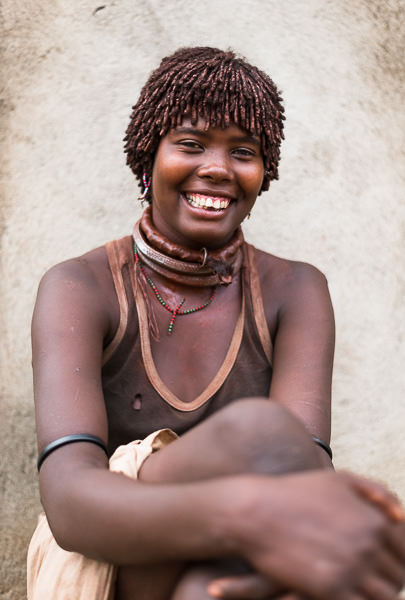
I love this shot of a Hamar woman, but I don’t love what happened after I took her picture. She began angrily insisting that I pay her 10 Birr instead of the 5 Birr we discussed, and ripped money out of my hand, nearly tearing the bills in half.
I should note that my experience at a Hamar bull jumping ceremony did not incur incidental, individual photo fees, but instead a lump sum for entry.
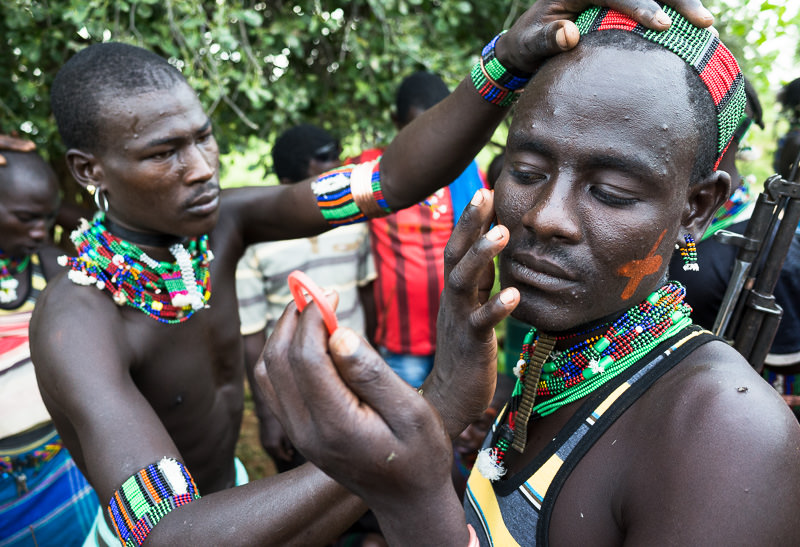
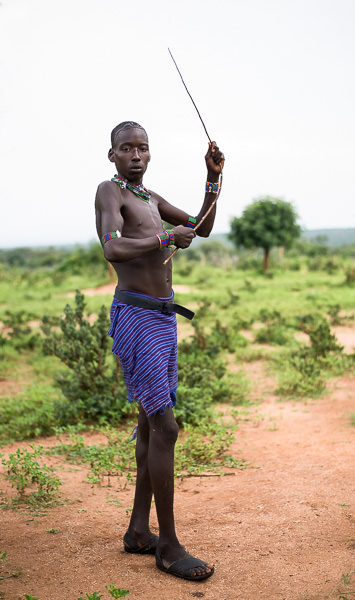
It was not necessary for me to pay these Hamar men individual fees for taking their photographs at a bull jumping ceremony.
#4. Position and Direct your Subject
During village visits, I found that it was acceptable to move subjects to nearby preferred backgrounds or into better light as needed. This kind of setup time did not usually eat into my allotted shooting time of 5-10 seconds (per 5 Birr, per subject).
It’s also not totally out of the question to direct your subjects a bit. If you want to reposition their body or eyeline a bit, physically show them what you want them to do by doing it yourself – but keep it quick and simple. The easiest eyeline to relate is direct to camera – but know that some subjects will gaze into the distance no matter how many times you point at the barrel of your lens.
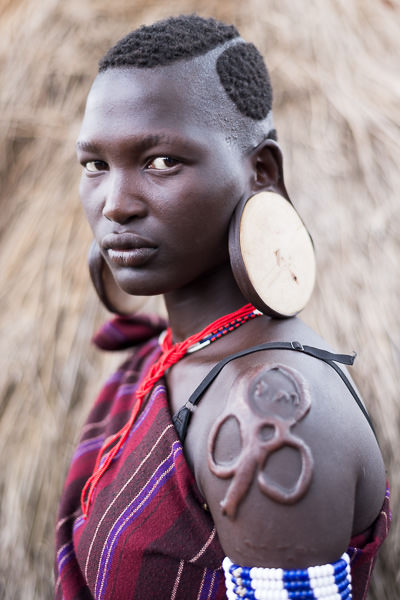
I positioned this lovely Mursi woman in front of a grass hut which served as a background, and had her stand with her shoulder facing toward camera to show her ornate scarification and stretched earlobes.
Make the photographic experience positive for your subjects if you can. If you are pleasant and friendly while working with your subjects, you will more often than not get better, more relaxed looks and poses on camera. Plus, it’s just more fun for everyone this way.
Also: if you have a local guide that speaks the tribe’s language, you can ask for your guide’s assistance with posing. Some guides will be more helpful than others.
I would caution against placing your subjects in inorganic poses or involving outside hand props, especially if your photographic approach is that of documentation.
#5. Finalize Your Camera Settings
Before raising your camera to your eye to shoot, reconfirm/finalize your camera settings for proper exposure / depth of field / white balance as you required for the situation. Be quick about these things, of course. Also, don’t take “test” shots of your subject, because this always starts the clock on your available shooting time.
#6. Shoot!
Shoot for your 5-10 seconds, on ONE camera, and do not change lenses. The reason I say this: if you shoot on two cameras, your subject(s) will likely protest, and you will often find yourself paying an additional session fee to each subject. Changing lenses usually triggers the same kind of reaction. So pick a camera, and pick your lens, and stick with it. If you need more shots of that person on a different camera or different lens, be ready to pay them again. Reframing on a zoom lens shouldn’t trigger a “second lens” protest, but be quick about recomposing so you don’t run out of time.
Within this 5-10 second window, I found that I could usually pop off about 5-10 actuations without vocal protest from my subject. However, a few locals tried to count the total number of audible shutter actuations my my DSLR and protested that I should pay the negotiated fee for each individual shutter actuation. Most people did not do this, but a few did. The best way I found to deal with this situation was to remain calm, quickly pay my subject the original fee (5 Birr or thereabouts) and to immediately move on.
Without a doubt, shooting a portrait in 5-10 seconds and trying to get something great out of it is quite challenging, even with a great subject.
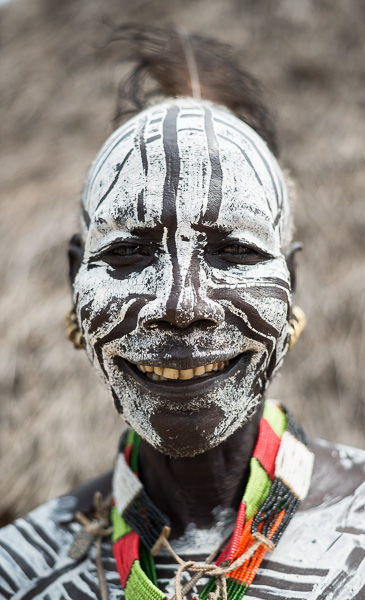
I spent more than my allotted 5-10 seconds photographing this Karo man, and he rightfully insisted I pay him 10 Birr after our short session was up. He was right, so I paid him the additional fee.
#7. Pay your Subject(s) after Shooting
Pay your subjects after photographing them, never before. If multiple people are in your photo, expect to pay all people in the photo. This often includes additional costs if a baby is in a shot. Pay each subject individually (obviously you don’t have to put money in a baby’s hand, but you know what I mean).
Some subjects won’t thank you nor smile when you pay them. Don’t take it personally.
Additional Notes on Photographing the Tribes of South Omo
Don’t expect to “get away” with anything.
I don’t care how stealthy of a street photographer you think you are – locals will be watching you intently and will often insist on payment if you point your camera in their direction – even if you’re at a distance or are shooting on a wide lens that doesn’t even feature said person prominently in your composition. Sometimes you can get away with this in busy markets, but sometimes not. Be prepared for vocal protests and annoyed looks whenever you raise your camera to your eye. This is just how it goes. I even had a few locals run me down, demanding image review of wide market shots, just so they could ask for money if I was featuring them in a shot. Sometimes I’d show them the LCD of my camera to satisfy the person in question, sometimes I’d just shrug and walk away. These confrontations were never fun, but I learned to expect them and to handle them calmly as my South Omo trip progressed.
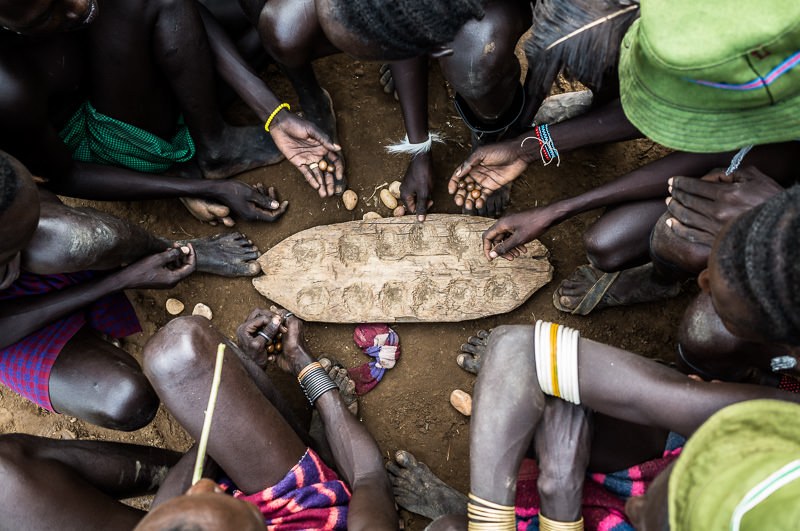
Men from the Dassenech tribe playing a traditional board game in Omorate. When I shot this picture, I figured it would be fine as I didn’t feature anyone’s face – but I was quite wrong. The second the men realized I had taken a photo, they ALL started angrily protesting that I pay them. I thought this a bit odd, as I hadn’t staged this photo in any way, nor asked them to do anything they weren’t already doing.
Some subjects are going to be better on camera than others.
Some locals are entirely comfortable on camera and make amazing on-camera subjects with minimal interaction / direction. Some locals are shy, or uncomfortable, or are altogether difficult to photograph. Both of these types of subjects must be paid the rate you to which you agreed before photography commenced – do not fight this. If a subject is difficult to work with, be kind and calm, pay them, and move on.
Keep an eye out for multiple looks.
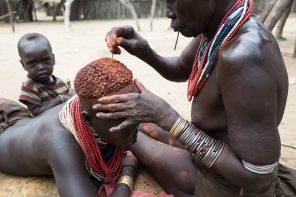
During village visits, some members of a tribe will change their look several times in efforts to get paid for multiple photos. This is often done via change of headdress, beads, earrings or lip plates. Keep an eye out for familiar faces if you don’t want to multiple shots of the same person. This can be tricky, because village visits can be chaotic endeavors.
The below Mursi woman managed to get me to shoot and pay her twice, and almost a third time as well, thanks to a simple change of headdress. This isn’t really a problem, per se – but as I had limited time in the Mursi village, I would have rather captured shots of other individuals than just shooting the same person twice.

Be aware that what you see may be invented just for the camera.
Many of the ornamented looks you’ll see during village visits, especially some of those involving large and unwieldy headdresses or wild face/body paint, are either looks that are not typical in the day-to-day life of the tribe, or are creative works invented solely for tourists’ cameras.
My advice is to make the best of it – shoot what you like and enjoy your time in South Omo, but be sensitive to the fact that tourists and their cameras have changed the cultures and economies of southwestern Ethiopia’s tribes on a grand scale, and what you’re seeing might not be as “authentic” as you might like.
Thanks for reading!
Please comment below if you have any thoughts on best practices for photographing the tribes of South Omo. I would love to hear from anyone that traveled there prior to this place becoming a bit of a photo-circus, and also anyone that’s spent a great deal of time getting to know one tribe or another. And as usual, let me know if I got anything wrong! Safe travels!


Thanks for the great write up, I am currently planning a tour to the Omo Valley so this information is really helpful. I get a bit jaded when I go to the Maasai Villages, because they always want to direct people to their “Stores”. So, I kinda get what can be the norm, but I was hoping to get more time with each individual and at least shooting mirrorless I can turn off the shutter sound with these visits.
Thanks again for the effort in putting this all together, it’s a fantastic resource.